
 THIS is the kind of thing I can’t wait to do when I have my YouTube channel up and running. Gaaaah I’ve just been busy and it seems like filming, editing and all the small details is going to take so long initially. I think through this photo tutorial you will be able to gauge it easy enough (I hope!).
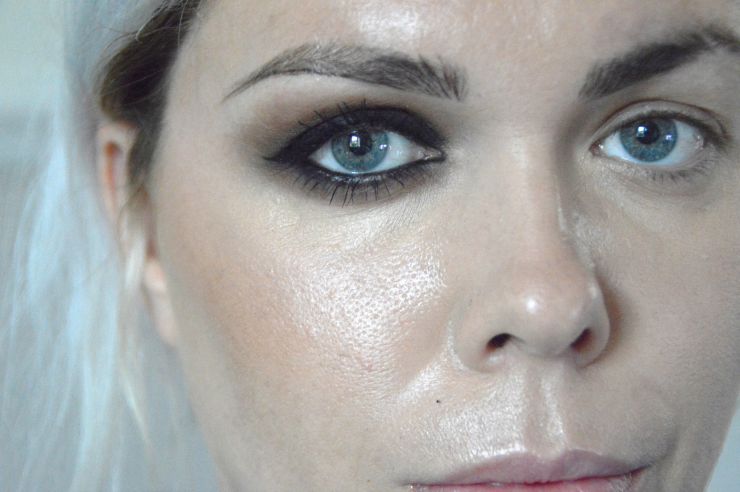
THE SMOKEY EYE is probably my most requested makeup look when it comes to my makeup clients and it’s the classic evening/special occasion look that makes you look ‘done’ and also makes you feel really confident and good about yourself. It’s the ultimate sexy makeup look teamed with some glossy nude lips. It can be complex and sometimes I can use a gazillion products, tones, shades, glitter etc to get a really spectacular red-carpet look, but for us normal girls…who don’t have the time, technique or amount of product to get *that* kind of look then I have broken it down into a really simple way ; minimal products, easy technique and pretty much any makeup scardey-cat can achieve this with a bit of practice and dedication.
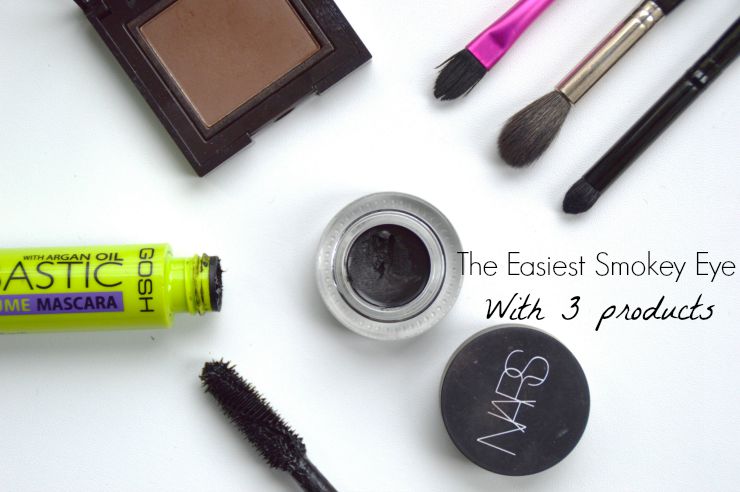
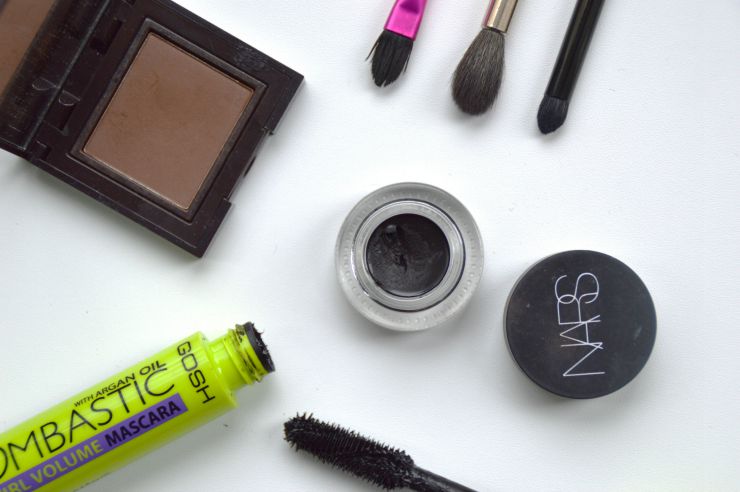
T H E 3 P R O D U C T S
1 x NARS Eye Paint (Black Valley)
1 x Laura Mercier eyeshadow (Truffle)
1 x GOSH Black Mascara (Boombastic Swirl)
Obviously this is for a dark smokey eye but you can change up the colour of any of the above products; a nice deep brown gel liner instead of the black would soften up this look and still look ultra glam. Also you can swap up any of the above for something similar you have @ home – any gel liner will do that has a good staying power.
M E T H O D
1.) Prep the lids. De-shine and de-grease with a touch of translucent powder or similar.
2.) Apply your base colour. This is the black gel eyeliner. May feel really weird but THIS WORKS! Apply it all across the eyelid just up to the crease. If you want to keep it more toned down then just on the crease or below, if you want full-blown drama then apply it to just above the crease. I have applied it to just above the crease. I literally press the product on, use a synthetic flat brush of some kind. Start at the lashline and finish up to the crease as this will dry quickly and you need the gel liner to be a little bit ‘wet’ still for the next step. So I do one eye at a time and repeat.
TIP: It doesn’t need to be neat or rounded off at all, see my picture below – any jagged bits will be buffed away!
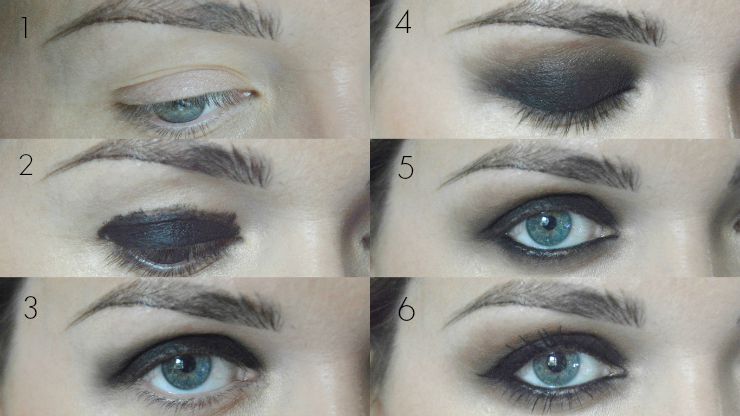
3.) Get Blending with your go-to fluffy brush (MAC 224 or such) before the gel base dries then buff and blend it and smoke it out. It’s easier than you think. The best way I find is to do tiny circular motions all across the lid and work the product to the effect you want. It should already pretty much look like a smokey eye.
4.) Add a touch of a neutral brown matte tone into the crease and blend this away into your skin. It just stops it from looking so harsh…….and black. I love the shade Laura Mercier ‘Truffle’ as it is a warm tone but still quite dark and sultry. You don’t want to use anything too pale or metallic as it will turn on top of the black liner into a murky/weird tone.
5.) Go under. Use the same black gel liner and a smaller brush to add depth underneath and follow/soften with the brown shadow to again, soften the black and smoke it out. You can also wing out the eyeliner if you want more drama and shape to the eyes.
6.) Heaps of mascara. Job done.
I am pretty well-practised at this so I can do it in around three minutes. You just need to just get the application and placement right and get practising and it’s super quick. I love it as it looks like SO much more effort has gone into it than it actually has. A smokey eye like this looks so chic with a nude glossy lip, but equally can be va-va-voomed up with a strong red lip.
Is this something you think you will try? I’d love to hear your thoughts and/or questions.
