
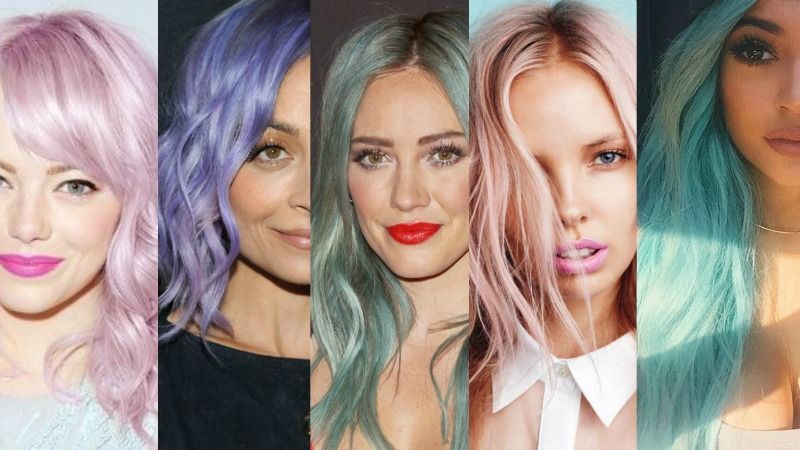
 It’s now a common sight ; hair all the colours of the rainbow from neon yellow and green to grey and ALLLLLLL the pastels. I have been a few colours over the last few years and more recently a pink / pinky lilac and a grey lilac. I do love having the pastel shades in my hair and I have been stupid brave enough to do an ‘at-home-job’ on it but straight up, I would advise you go to one of those trendy hair salons to have it done by a pro. It may cost a little more initially but you won’t have to spend time and more money on correction jobs if you fuck this up.
The reason you may have stumbled across this article though, is because you WANT to try it at home so I am going to give you a few tips and pieces of advice on how to achieve pastel hair shades and colouring hair extensions, even if you have dark brown hair naturally like myself. The absolute key to having that soft pastel shade is that underneath your hair needs to be bleached up to a very platinum blonde /white. Once you have achieved this, which is the hardest bit, the pastel stuff is really easy. And Fun. The bleaching process. Not so much.

** I am not trained in hair cutting, colouring or anything in between so I am not a professional and don’t profess to be ; this is just how I achieved my hair colour & I personally find it quite helpful to read about other’s at-home experiences on how to do it.
HOW-TO PASTEL YOUR HAIR
1. B L E A C H
The painful inevitable.If you are lucky enough to be blonde already then you won’t need to bleach up your hair quite as much, but depending on how pale blonde you are, you will probably still need a touch of lightening to get your hair to a super platinum, almost white blonde. I am a medium-dark brunette naturally so it took me around a month or two to achieve the initial blonde colour as I had to bleach my hair a total of 3 times to get it to lift enough and you don’t want to bleach it more than once per session and ideally give it a break of 2 weeks in between. (I rushed = very damaged hair) I went to Sally’s and purchased all the usuals for bleaching hair ; bleach powder, developer, toner & mixing bowls.
The first bleaching process I did on my hair was pretty terrible and turned it quite a yellow/orange-undertoned shade. I was pretty horrified but I just sucked it up and pretended all was going to be ok as I wept into my pillow each night until the next bleaching. WARNING ; You will possibly have to walk around with the worst hair ever for over a month if you bleach-job @ home. Jus sayin.
Fortunately, after a couple more times, and LOTS of treatments and love in between, it got to that very ashy, light blonde which is what I needed. If you are going dark to blonde then TONING is your best pal and I did this after every bleach treatment and then some. Every brunettes hair is different and takes to bleach VERY differently.
2. T O N E
This is to basically cut the unwanted brassy tones out of your hair, and usually with bleaching it will be the dreaded warm/orange/brassy shades. Your local Sally’s can recommend the right toning products, plus there is lots of decent ones available in Boots etc.
If you are lucky, then you may only have to do steps 1 & 2 just once and you are ready for the pastel fun, however if you are a bit of a darker brunette like myself, then give yourself a 2 week break (with lots of conditioning love) & go again on the above steps…until you have your platinum/white hair.
3. C O L O U R
The fun part….finally.
There are SO many colours available now and on the high street. You can custom blend your colours and mix a few together which Is what I usually do. You can also leave it on for shorter periods/longer depending on the depth of colour you want. One thing you need to know about having pastel hair is that it will wash out. Within Weeks. This is because pastel tones are watered down pigments so they do not stay in as long as a full-on dye. I have to give my hair a little boost once a week or go back to blonde very quickly.
Although time-consuming with the re-colouring with pastel hair, I also think this is the beauty of it, ; you can chop and change the shades really quickly, and if you get bored you can switch it up.
4. C O N D I T I O N
Your hair is likely going to be suffering from the initial bleaching process. Lots of attention and treatment is going to be needed. My hair is in quite a bad way right now as I had to bleach it up x3 initially. It has a lot of snappage (your hair literally will break off as it becomes so brittle) so you will need to invest some money into treatments. I am currently loving this Kerastase range, the Argan Secrets Miracle 10 leave-in conditioner and I always apply the Bumble & Bumble Repair Blow Dry if I heat style my hair.
5. M A I N T E N A N C E
The pastel colours vanish so rapidly that you need to keep maintaining the colour pretty much weekly or at least every other so be prepared to keep buying colour as long as you want it. I often will dye my hair a slightly brighter shade of pink/purple as after a couple of washes it soften down nicely and it will just last a little longer. I wash my hair with a silver or blonde shampoo with a purple tint to keep brassiness at bay and give a bit of lift to my current lilac/grey hues and I find this really effective. I also dollop a bit of colour into my conditioner to give it a ‘boost’ once a week.


HOW-TO PASTEL HAIR EXTENSIONS
My hair is naturally very fine and it struggles to grow past my shoulders, especially after the bleaching, so I have always worn extensions, and more so clip-ins (less damage & just easier for me) over the last few years. Since having pastel hair colours, I also started to dye up sets of extensions to match my shade. As I change it so often, I currently have around 4 sets of different pastel colours of extensions and it’s really fun to mix them up and experiment with the colours.
1. CLIP-IN EXTENSIONS
Ideally you want at least 2 shades of hair colour to dye if your budget allows
so you get an nice blend of tones and colour. It’s worth investing in good quality hair too, as longterm, it will save you money as they just last so much longer and keep the softness/condition and volume so much better.
The best hair I have ever tried for clip-in extensions are from Hot Hair which is an amazing online company specialising in all types of extensions. I have used clip-ins/extensions for over 12 years now and these are honestly the best I have ever tried. They are really super soft and have a lovely natural wave to them and the colour-range is really good with 14 shades to choose from. I have the 8-piece 19″ sets which is perfect for one full head of hair. I have 3 shades of blonde to get a really diverse blend of pastels and the shades I started with are : Pearl Platinum, Palest Blonde & Pale Wheat.


2. M I X COLOUR
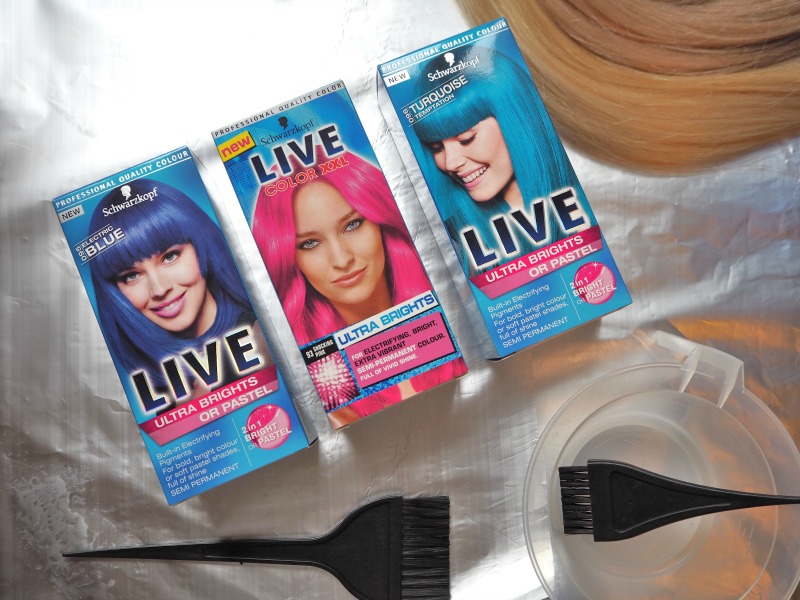
For my hair extensions, I have used LIVE Color XXL which is a great basic & budget-friendly, at-home colour and they have quite recently brought out some really bright shades including red, orange, pinks and blues. Initially you wouldn’t pick these up for dying a pastel colour BUT you simply dilute these shades down and you can pretty much customise any shade you like. The other main high street colour is probably BLEACH London which do great shades BUT they wash out super quick, LIVE Color are more concentrated and just stay in longer.
With the Colour Live, you need the tiniest dot of colour in your mixing bowl and simply mix it with conditioner to *pastelise* it and apply. If you are wanting multiple colours, just use multiple bowls. I only had 2 so a plastic tupperware bowl came in handy. I ended up using around 5 different blends of pastel colour on this hair. Colour Live XXL shades I used are 093 Shocking Pink, 095 Electric Blue, 096 Turquoise Temptation.


3. APPLY COLOUR
As I said before, I think hair colouring works best when you do it on multi-colours of hair so you get left with colour blends as opposed to one solid block of colour. Not only does it look more *natural* (as natural pastel lilac hair can look) but you get more leeway if/when your own hair washes out and it’s not quite a perfect match.
I set up my work station in my kitchen, or just use anywhere where you have an area of flat space. I then got loads of layers of foil, and split up the clip-ins and apply the colour to the hair as they sit on the foil, these makes them easier to wrap and also protects your surfaces.
As it contains no bleach it won’t damage the hair, but the longer you leave it, the more the colour will pick up. I left these colours on for around 30 minutes.
4. RINSE / DRY
Rinse the colour out with warm water and shampoo/ lightly conditioner as you would your own hair. I then leave them on a towel over a radiator to air-dry (overnight) if time allows. I just think if you spend £ on good quality hair, then try and prolonging it’s life by not heat styling it if not necessary.
5. STYLE
Once the hair is dry then comb through and style them to how you wear your hair ; straight/wavy/curly. I always have a slight wave in my natural hair so I lightly tong my extensions so they also have a wave and it just blends in nicely and looks more natural.


Have you ever been down the pastel hair dye route? What do you think of the new shades?

